I’ll be the first to admit that I am not a crafty person. Personalized stockings? Don’t expect to get one from me. A wreath made entirely out of ornaments? No way, Jose. A homemade sugar scrub? Definitely not, but I will grab one for you at Sephora. Needless to say, I typically avoid the D.I.Y. category on Pinterest but when I saw a tutorial on how to make a gift bag out of wrapping paper, I figured it was so easy even I could pull it off. Well, that and I could post it to PinterestFail.com if it turned out to be a total flop.
Not only is this D.I.Y. bag extremely easy to make, but it is also an easy way to save a few bucks around the holidays. Let’s face it, the prettiest bags are the most expensive and have such a high potential of being immediately thrown away that they sort of feel like a waste of $5. Wrapping paper is so much cheaper and you can get more bang for your buck if you make multiple gift bags from the same roll.
You’ll only need a few materials for this project including: scotch tape, scissors, ribbon, and your choice of wrapping paper.
Step 1.
You’ll need to decide how big you need your gift bag to be, depending on what you’re going to put in it. It’s better to overestimate than to have a bag that is too small. After you’ve rolled it out and decided how much to use, cut the wrapping paper to size.
*Helpful hint: when you roll the paper out, the shorter sides should be on the right and left. The longer sides should be at the top and bottom.
Step 2.
Place your wrapping paper face down (or pretty size down) on the table. Fold both sides until they meet in the middle. Pull them to slightly overlap each other and then tape the seam.
Step 3.
Fold the bottom end of the wrapping paper up. If you want your bag to be a little taller, then keep the fold small. If you’d like a shorter bag then I recommend folding the bottom end to the center.
Step 4.
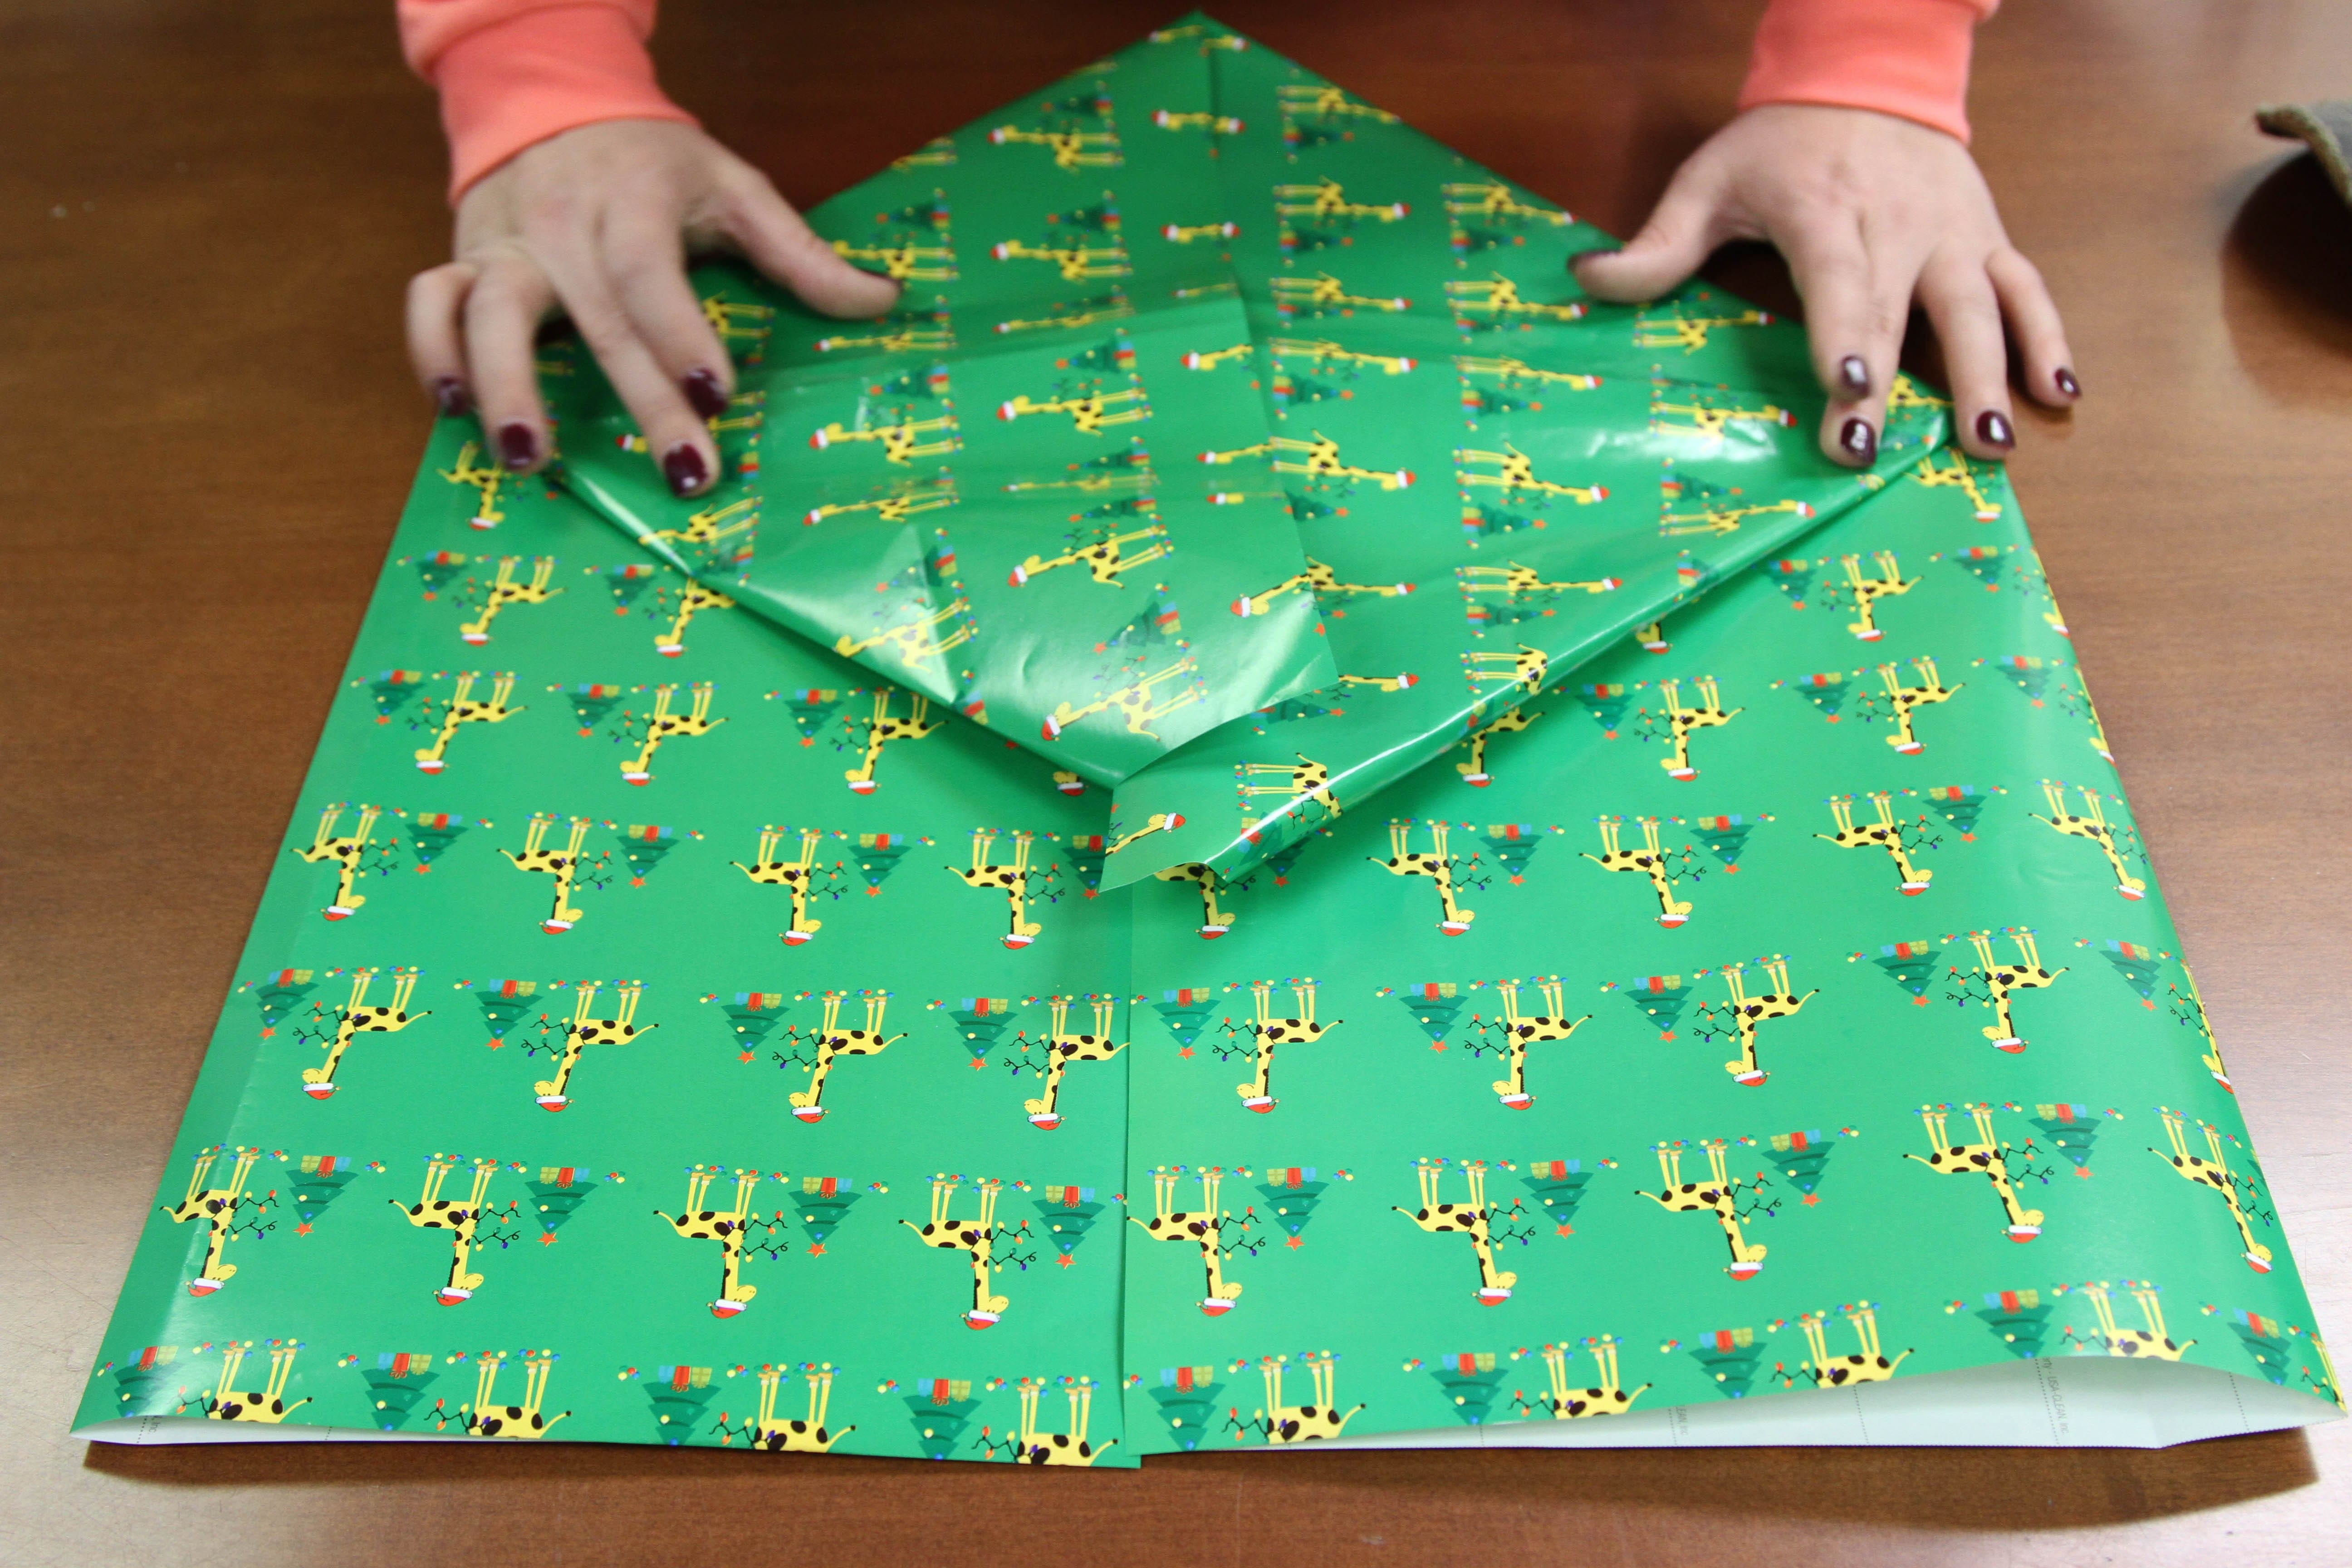
Separate the two sides of your newly created fold and flatten out the corners, creating a diamond. Fold in each side to the middle of the diamond and secure the seam with tape.
Step 5.
Stand up your bag and open it up! Cut ½” slits on the side creases and fold each side inward. Smooth the fold. Using a hole punch, punch holes for your ribbon handles.
*Helpful hint: To make sure that your holes are even, punch holes on both sides of the paper. Carefully pull your ribbon through the holes.
Step 6.
Place your gift inside the bag and bam! Look at you go, you crafty rockstar you.
Need something more to put in that bag? Shop one size fits all giftables for guys and gals here!


